Create and Manage JIRA Tickets with GuardRails
Introduction
In this tutorial, we will show you how to integrate GuardRails with your JIRA installation easily. This will allow you to easily create JIRA tickets based on vulnerabilities and keep track of which issues are related to specific vulnerabilities.
Prerequisites:
Existing GuardRails Setup
Existing JIRA Setup
JIRA Integration Setup
We will need to create an API token from JIRA to allow GuardRails to manage tickets on its behalf.
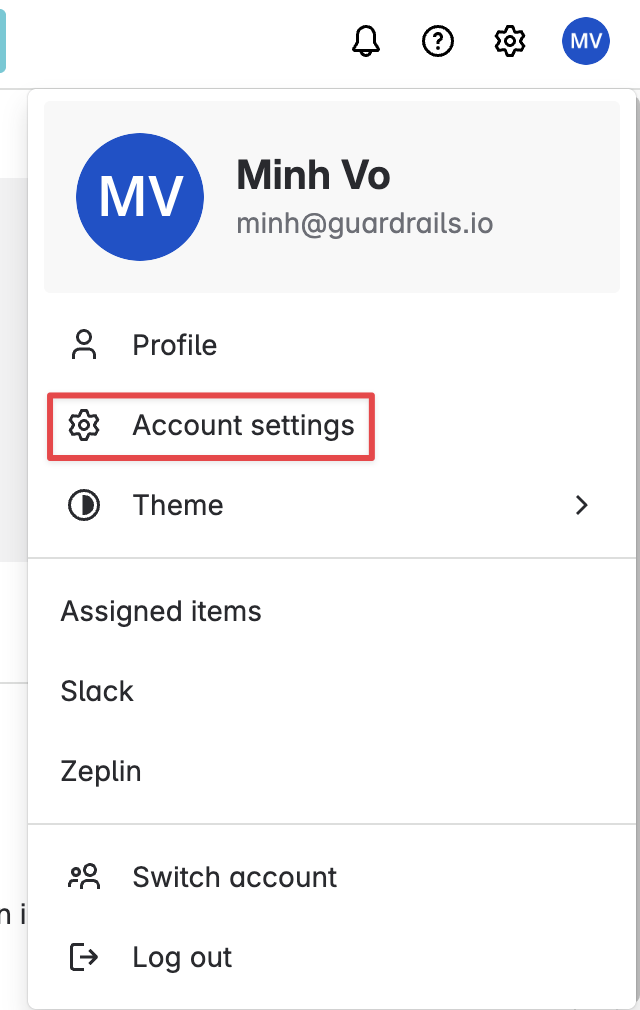
Go to "Account Settings" under your JIRA account
In the following page, on the top navigation menu, go to the "Security" tab.

In the Security page, under API token, go to "Create and manage API tokens"

In the API Tokens page, you will have 2 options to create the token
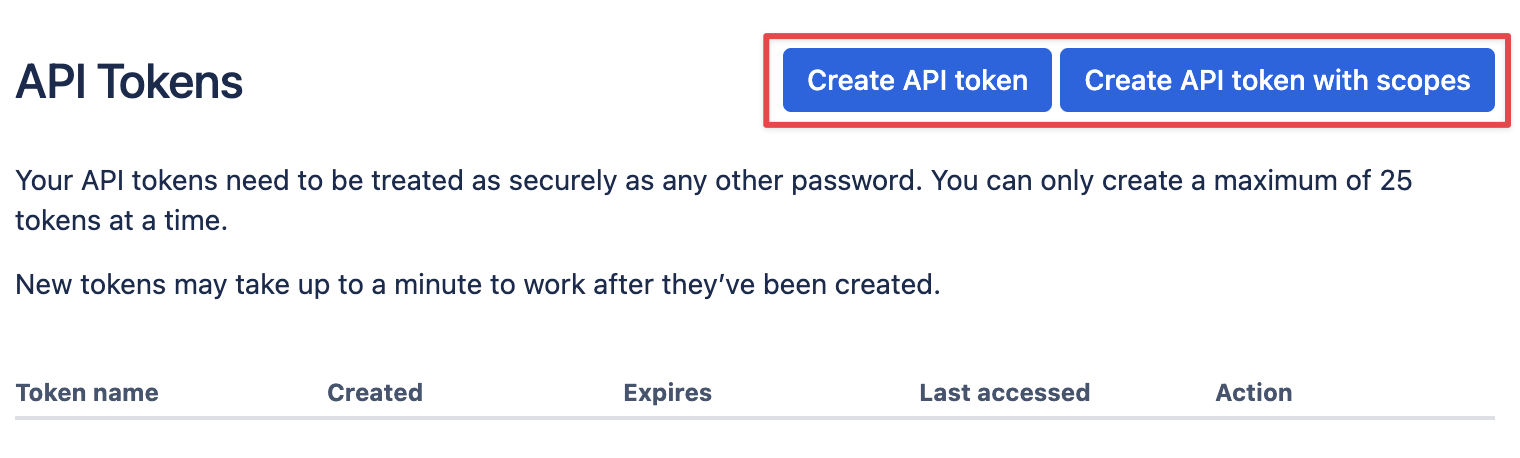
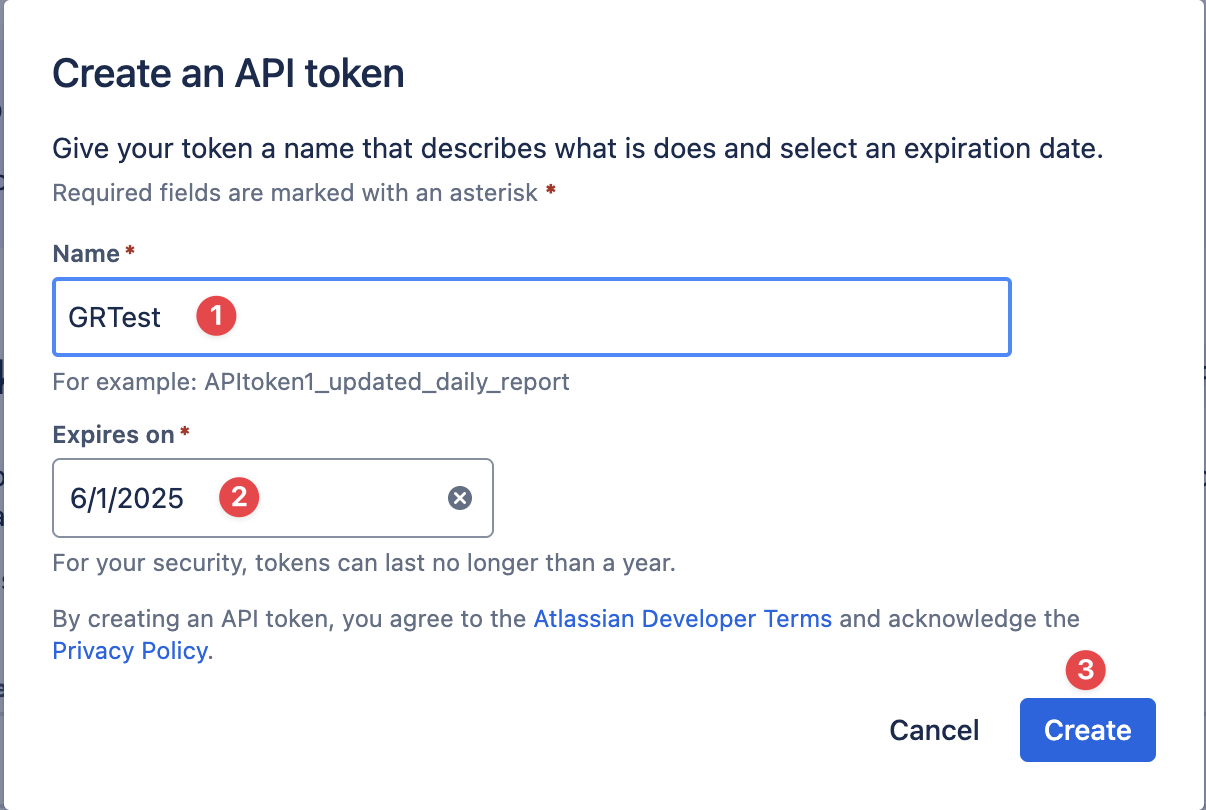
- Normal token (Create API token)
- Name your token
- Select expiration date
- Then creating token and copy the token information
- Scoped token (Create API token with scopes)
- Name your token
- Select expiration date
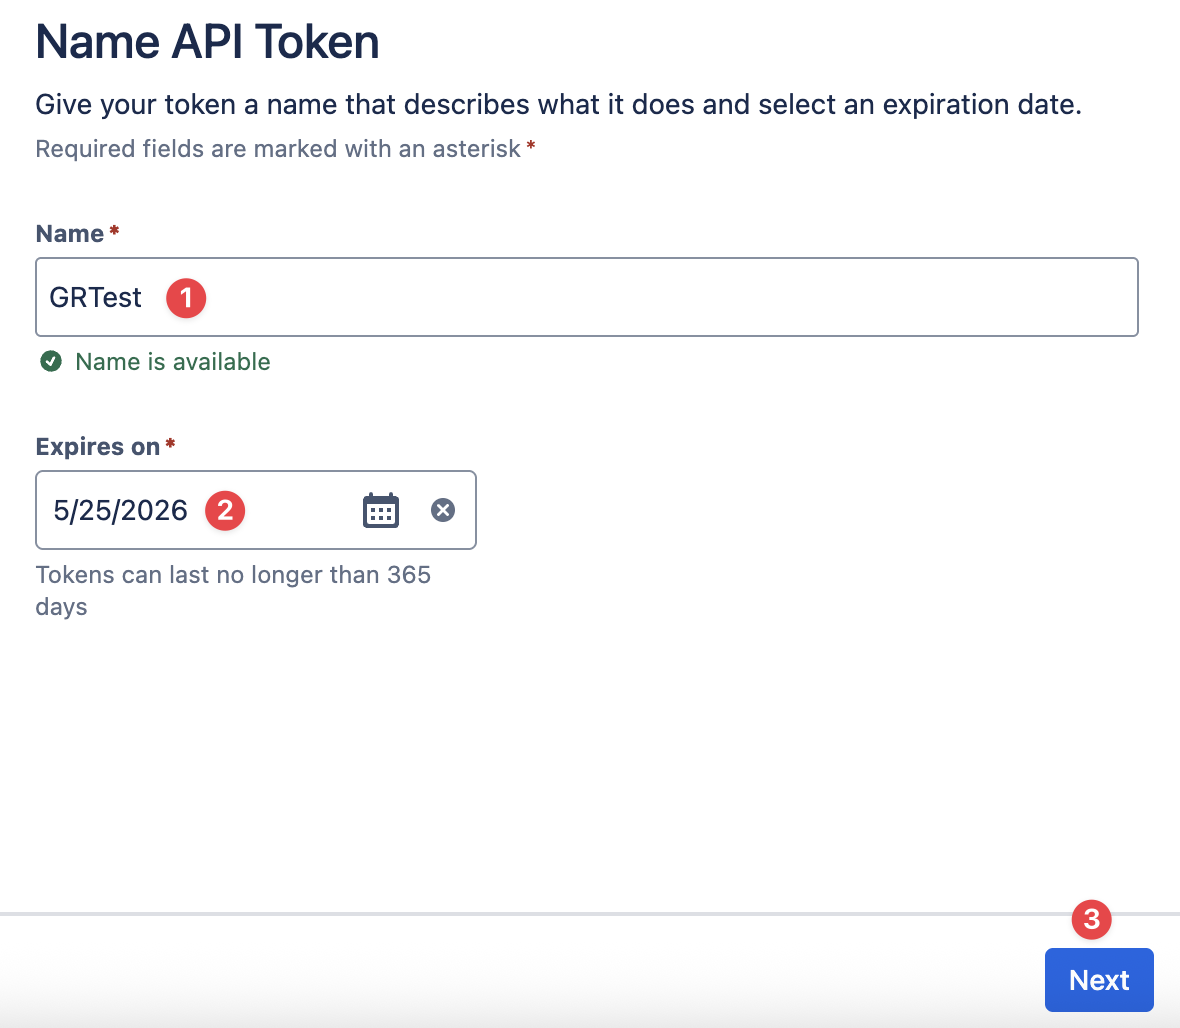
- Select "Jira" as the target app to use the token
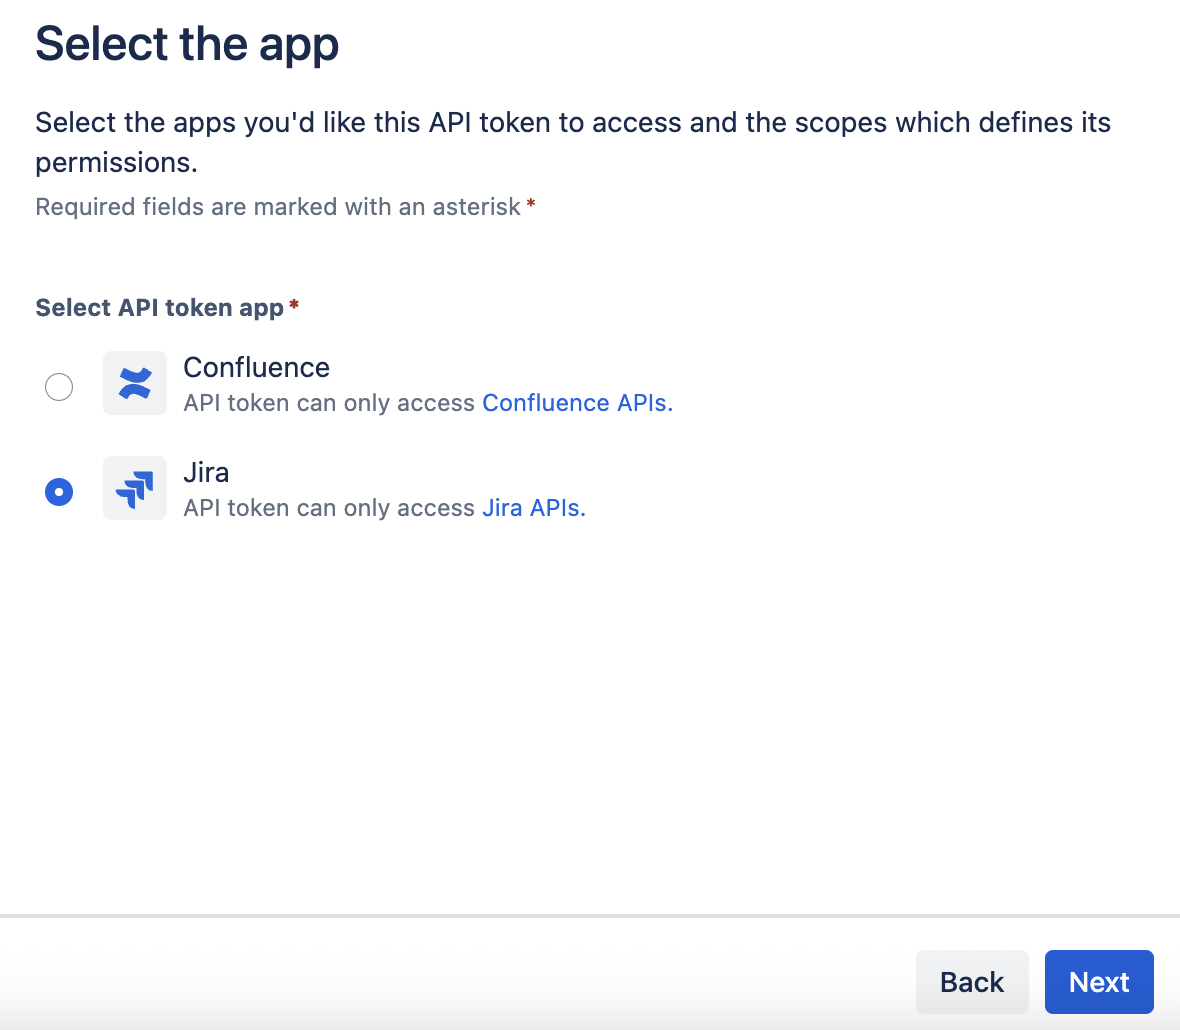
- Search and select these scopes below
- read:avatar:jira
- read:group:jira
- read:application-role:jira
- write:issue:jira
- write:comment:jira
- write:comment.property:jira
- write:attachment:jira
- read:issue:jira
- read:issue-type:jira
- read:project:jira
- read:project.property:jira
- read:user:jira
- read:issue-type-hierarchy:jira
- read:project-category:jira
- read:project-version:jira
- read:project.component:jira
- Review, then creating token and copy the token information
Now with the steps completed on the JIRA dashboard, we can proceed to the GuardRails Dashboard.
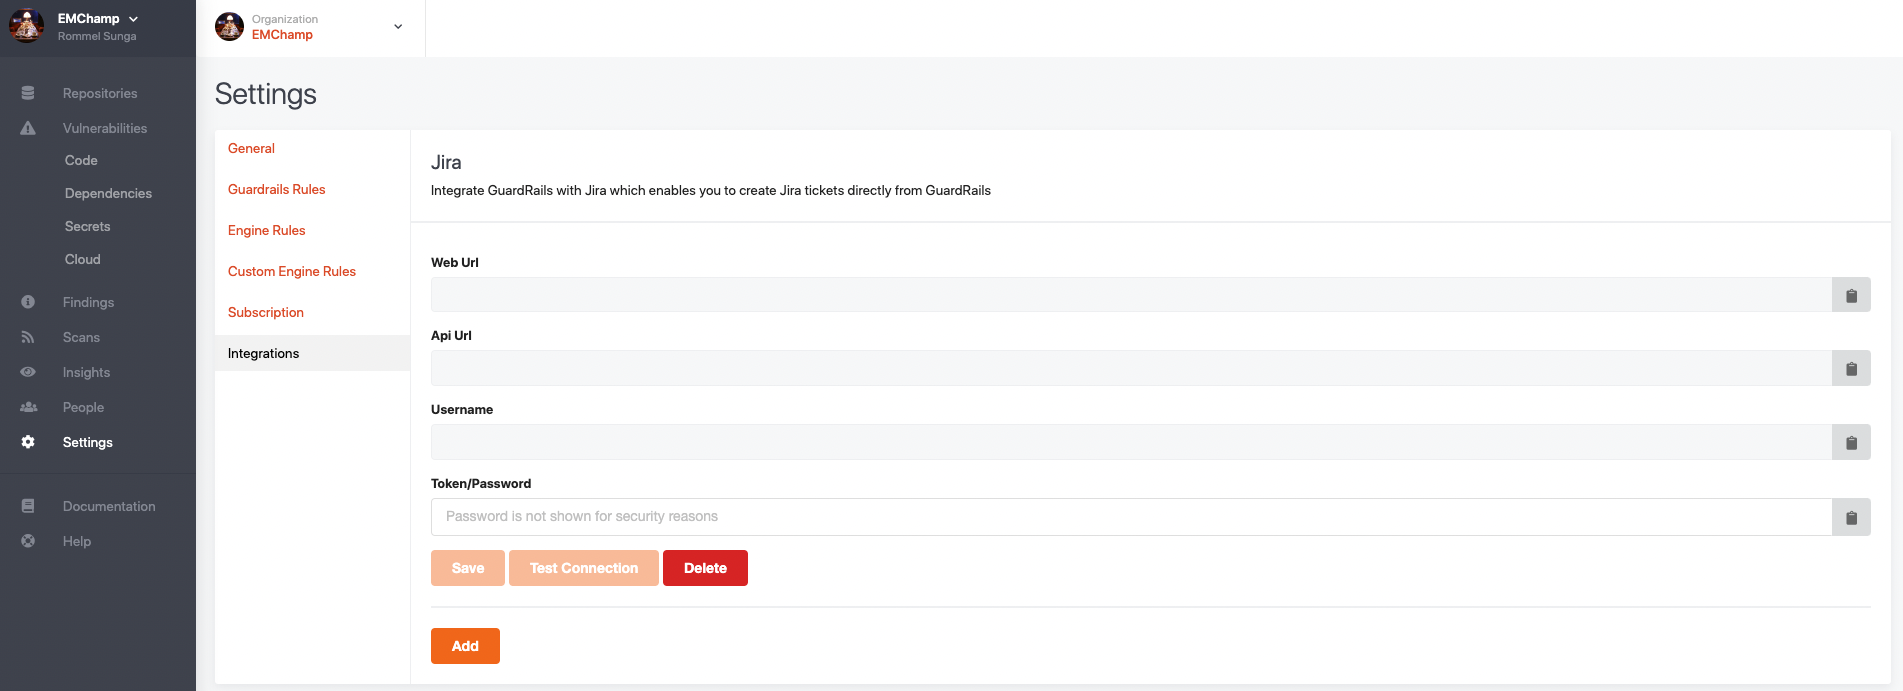
Under the Settings page, go to "Integrations" to see the JIRA integration section. Please fill in the following fields:
Web URL - Should match your base URL of your JIRA installation (e.g., https://rsguardrails1.atlassian.net) API URL - Should match the API URL of your JIRA installation. It is usually the same as your Web URL if you are a JIRA Cloud user. (e.g., https://rsguardrails1.atlassian.net)
Username - The email address that you use to log into JIRA. You can find this from your account button on the top right of the JIRA interface.
Token/Password - The API token we created in the previous steps.
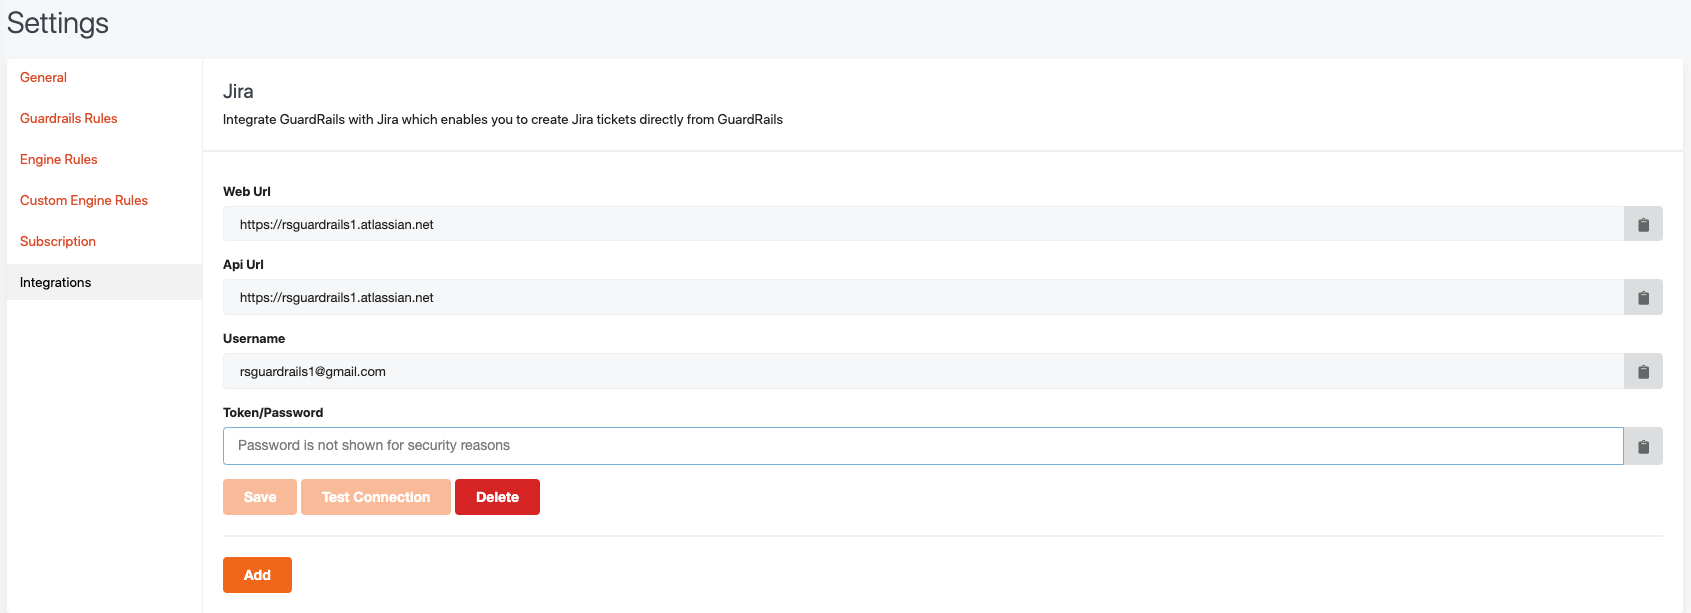
 Here is an example of the JIRA integrations properly filled in, except for the Token/Password, which you need to provide as well.
 Once these fields are filled in, select the "Save" button, you should see a success dialog in the middle of your screen.

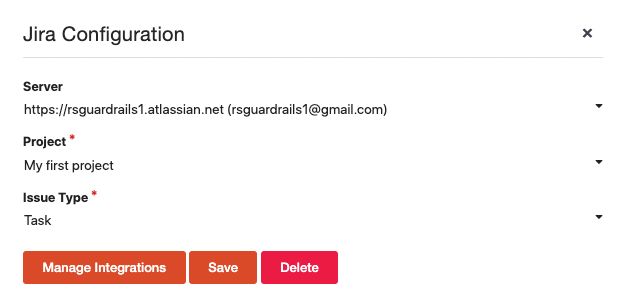
Finally, for each given repository that you want to attach to JIRA, you can go ahead and set which project and issue type you would like to assign to issues created for this repository.
 Select your desired settings in the dialog and hit save.
With these steps complete, we can go ahead and start using JIRA from GuardRails.
JIRA Usage
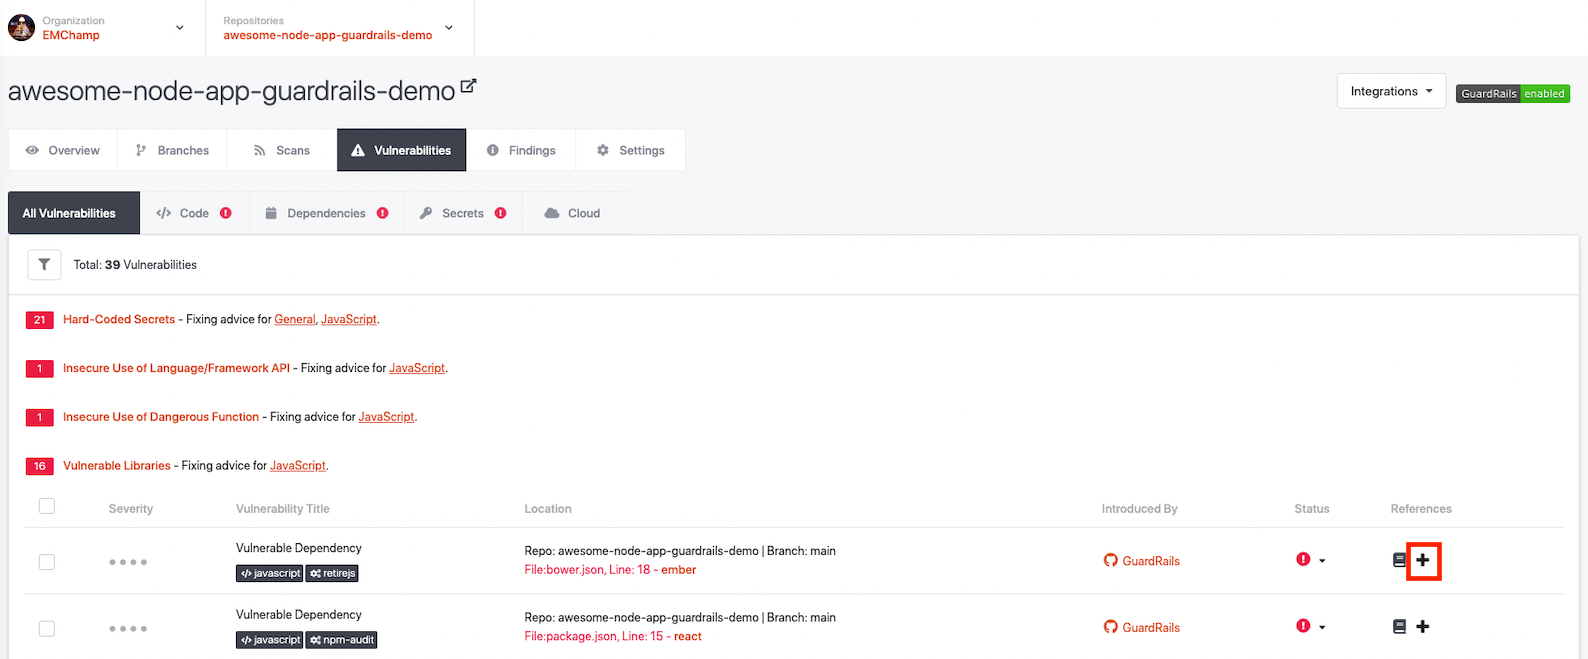
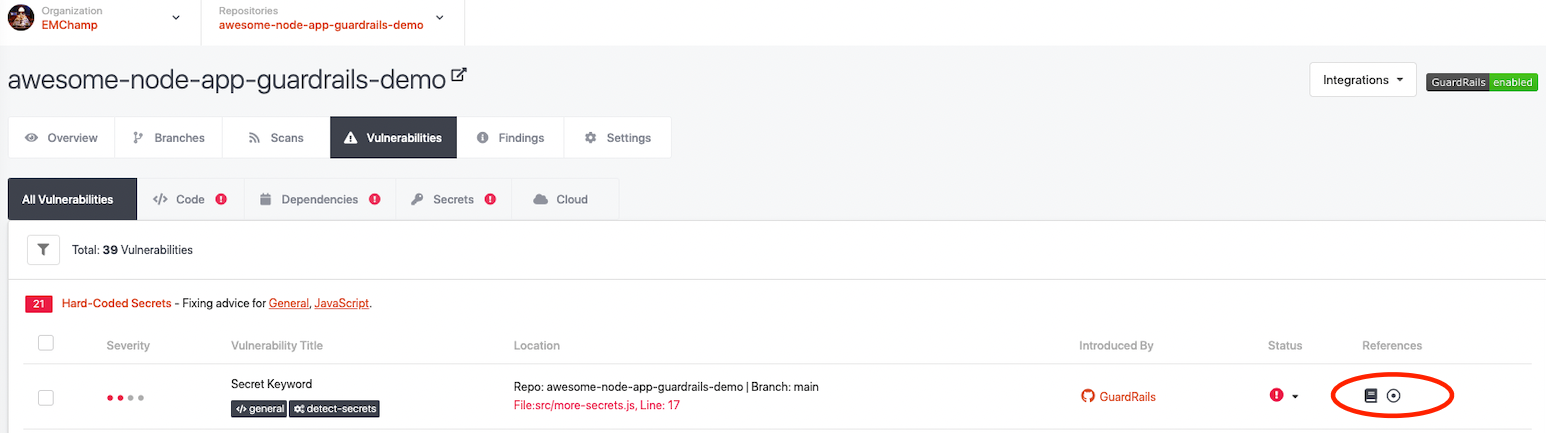
In order to create a JIRA issue based on a vulnerability, you can go to the Vulnerabilities tab in your repository and click the "Create JIRA Issue" button. It should look like a plus sign next to a vulnerability, highlighted in red in the image below.
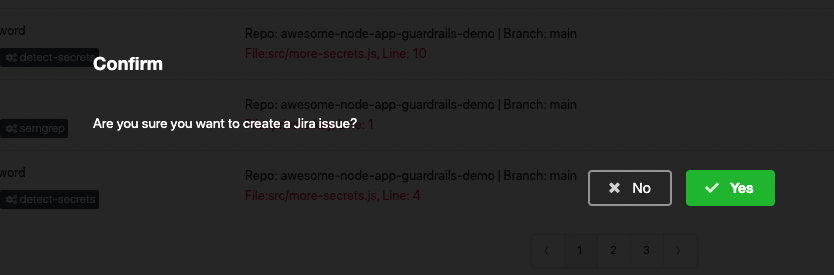
Click "Yes" in the on-screen prompt to create the issue.
This should result in a successful creation dialog in the middle of the screen.

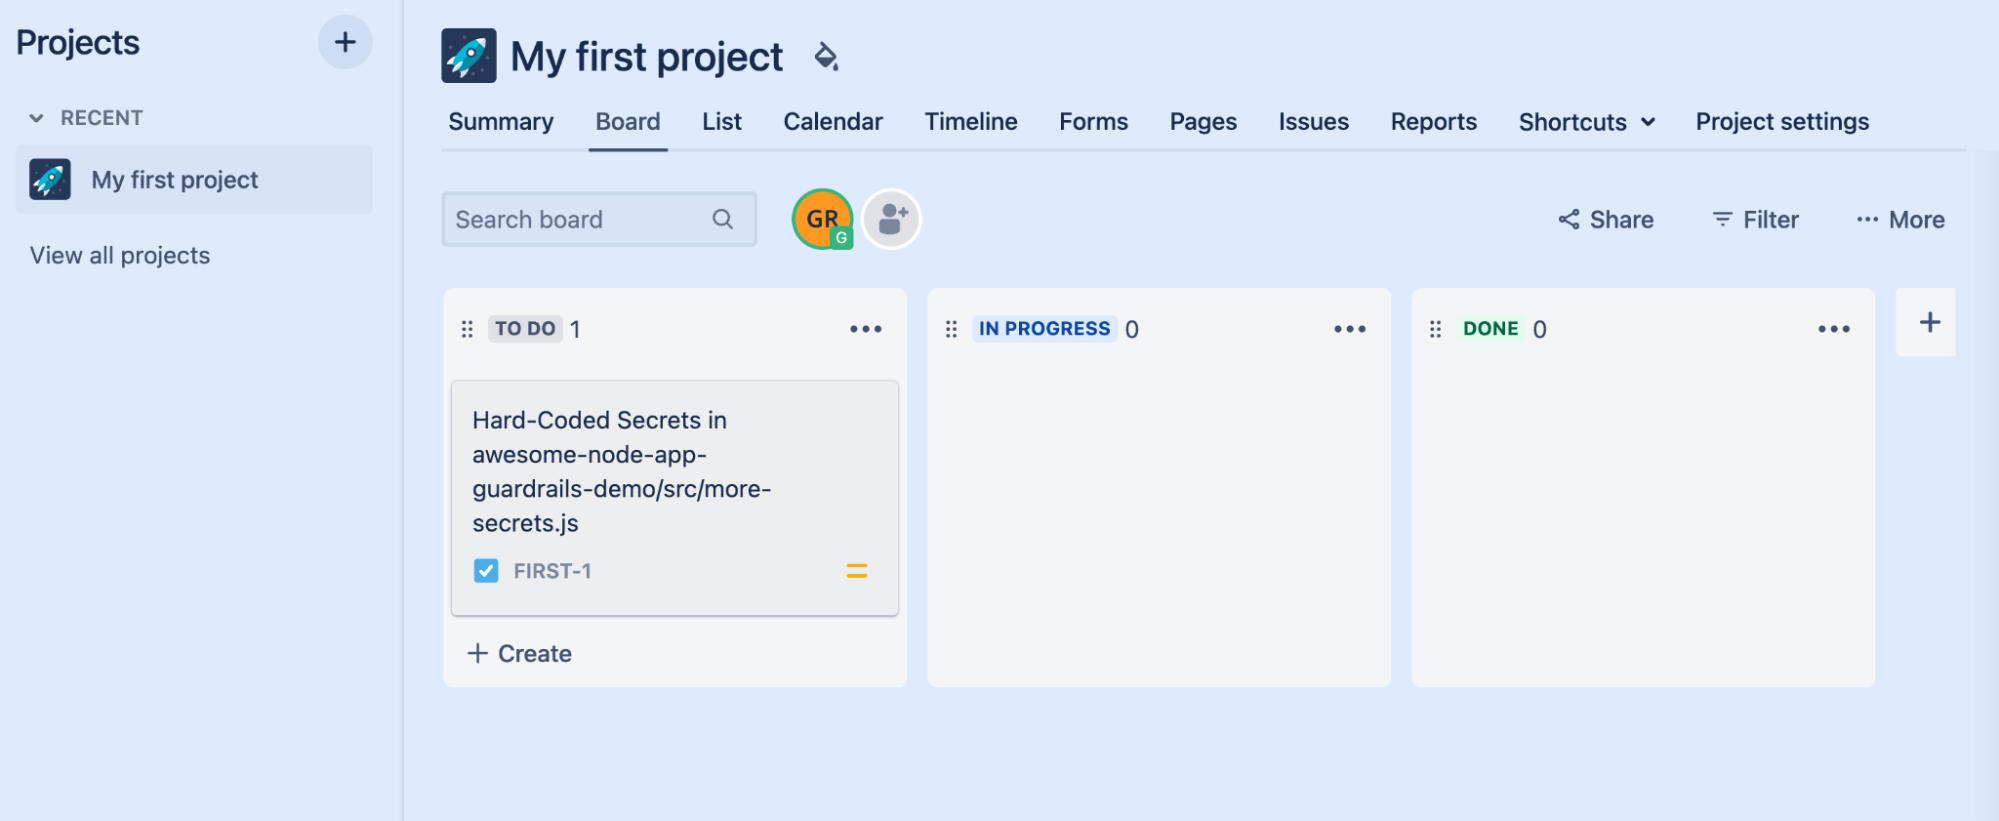
You can now visit your JIRA installation and view the project, which should have a new issue related to the vulnerability.
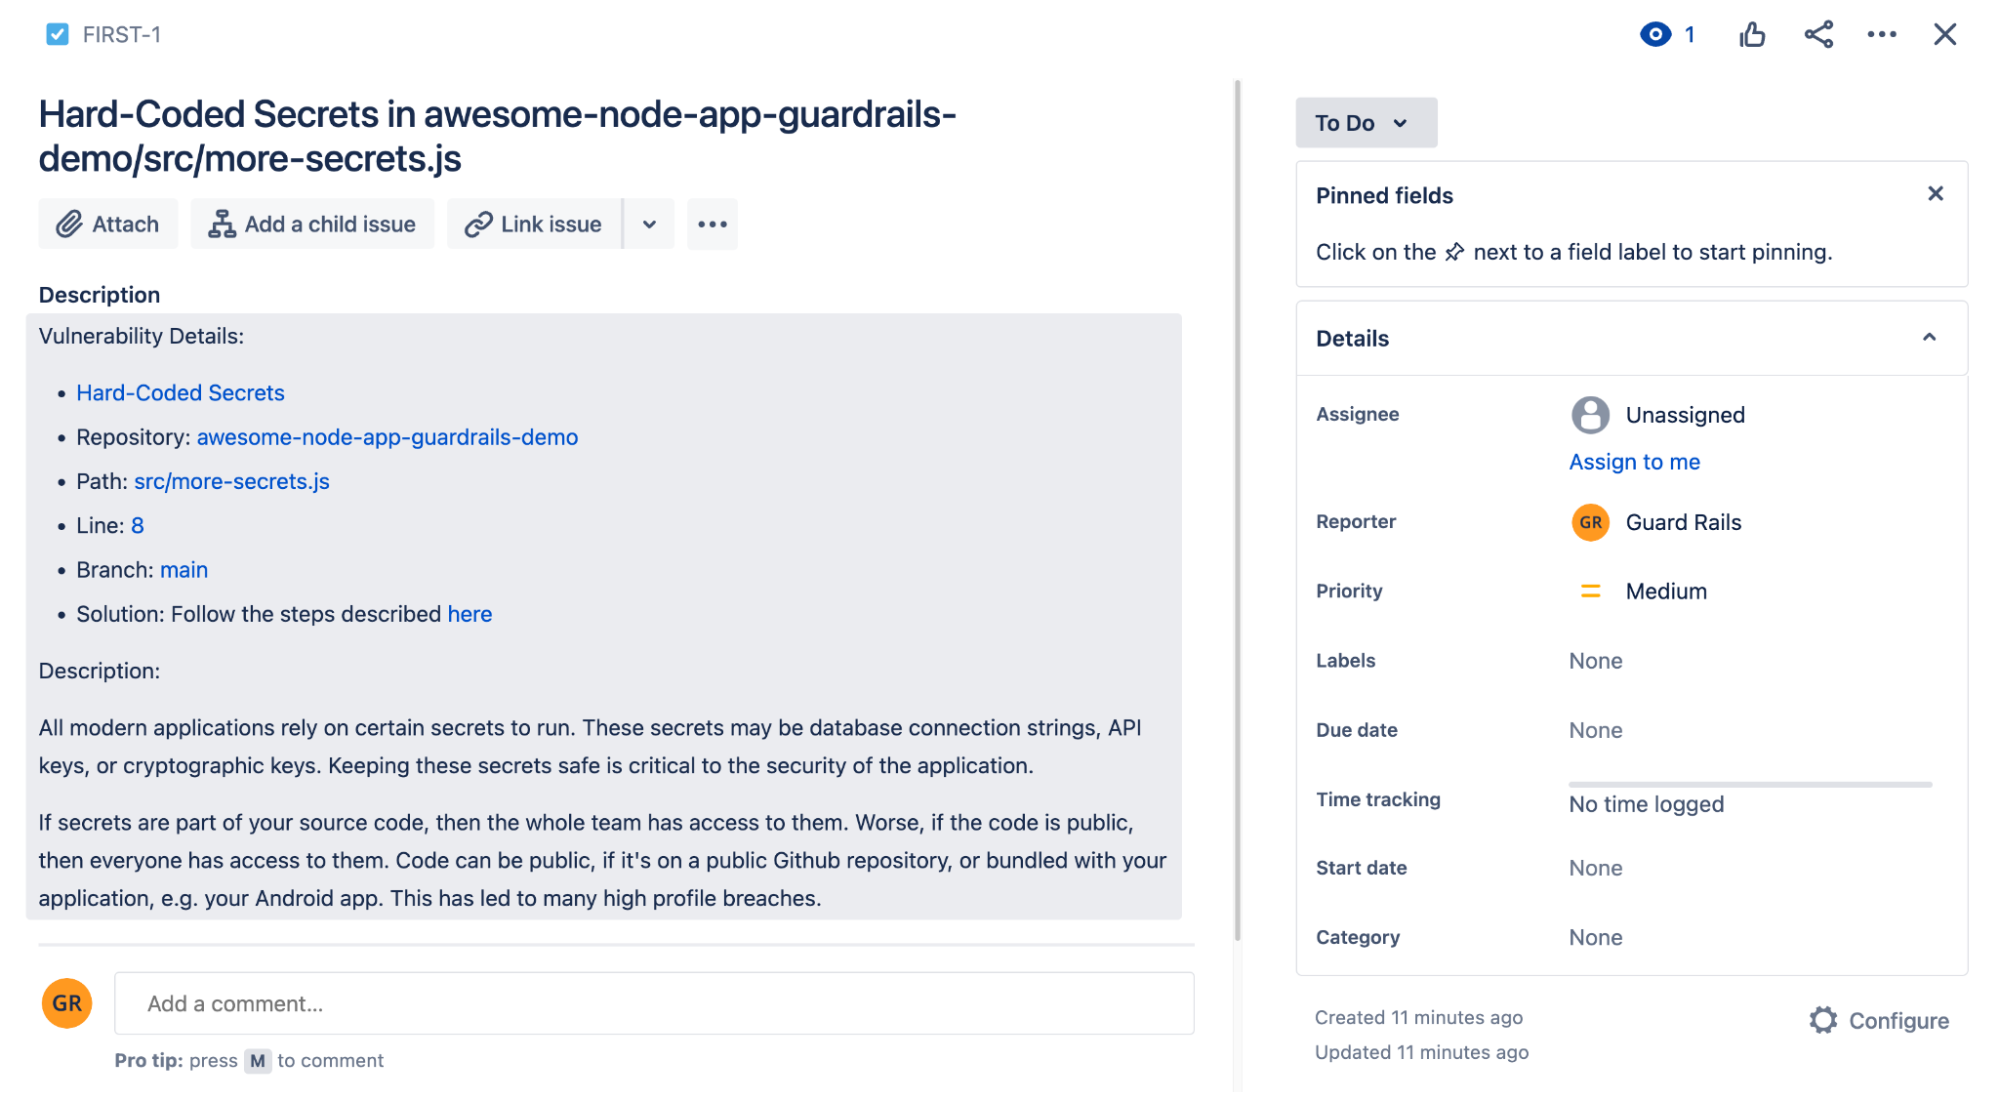
You can also open up the related JIRA issue at any time by clicking the "circle" icon under\ "References" for a given vulnerability.
Conclusion
After following this tutorial, you should be able to create JIRA issues from the GuardRails Dashboard easily, automatically include relevant context from GuardRails in the issues and track your JIRA issues from the GuardRails Dashboard.