Bitbucket Cloud Configuration
Overview
This page contains all the information needed to create a Bitbucket connect app and oauth consumer. This is needed to allow guardrails to seamlessly integrate into the development workflow and makes onboarding all repositories in your organization easy and quick.
Only required for Bitbucket deployments.
IMPORTANT: For this guide we will assume that <YOUR_HOST> will be the configured dns (i.e.: guardrails.your-company.com). So whenever you see a <YOUR_HOST> remember this.
Create the Bitbucket connect app
Before you continue with the steps below it is important that you have configured a Bitbucket app name in the replicated settings, as described in the deployment guide.
- Login to bitbucket.org
- Click on your profile image in the bottom-left corner of the page.
- Click on
All workspacesin the popup menu. - Select the workspace where you want to create the Bitbucket connect app in. Note the Bitbucket connect app secret key will be visible to all users with admin rights to the workspace, so you might want to pick a workspace that is exposed to as few people as possible. You can also create a dedicated workspace that is only used for the GuardRails Bitbucket connect app if you want.
- Click on
Develop appsin the workspace settings menu. - In the top-right click on
Register app. - In the
Descriptor URLinput box, enterhttps://<YOUR_HOST>/probot/bitbucket. - Click on
Register app. - You should now see your Bitbucket connect app togheter with the
Client IDandSecretin the Bitbucket UI. - Copy the value of the
Secretfield and store it somewhere where you can access it later, we will refer to this value as the<BITBUCKET_APP_SECRET>.
Create the Bitbucket auth consumer
- Login to bitbucket.org
- Click on your profile image in the bottom-left corner of the page.
- Click on
All workspacesin the popup menu. - Select the same workspace as you selected when you created your Bitbucket connect app
- Click on
OAuth consumersin the workspace settings menu. - Click on
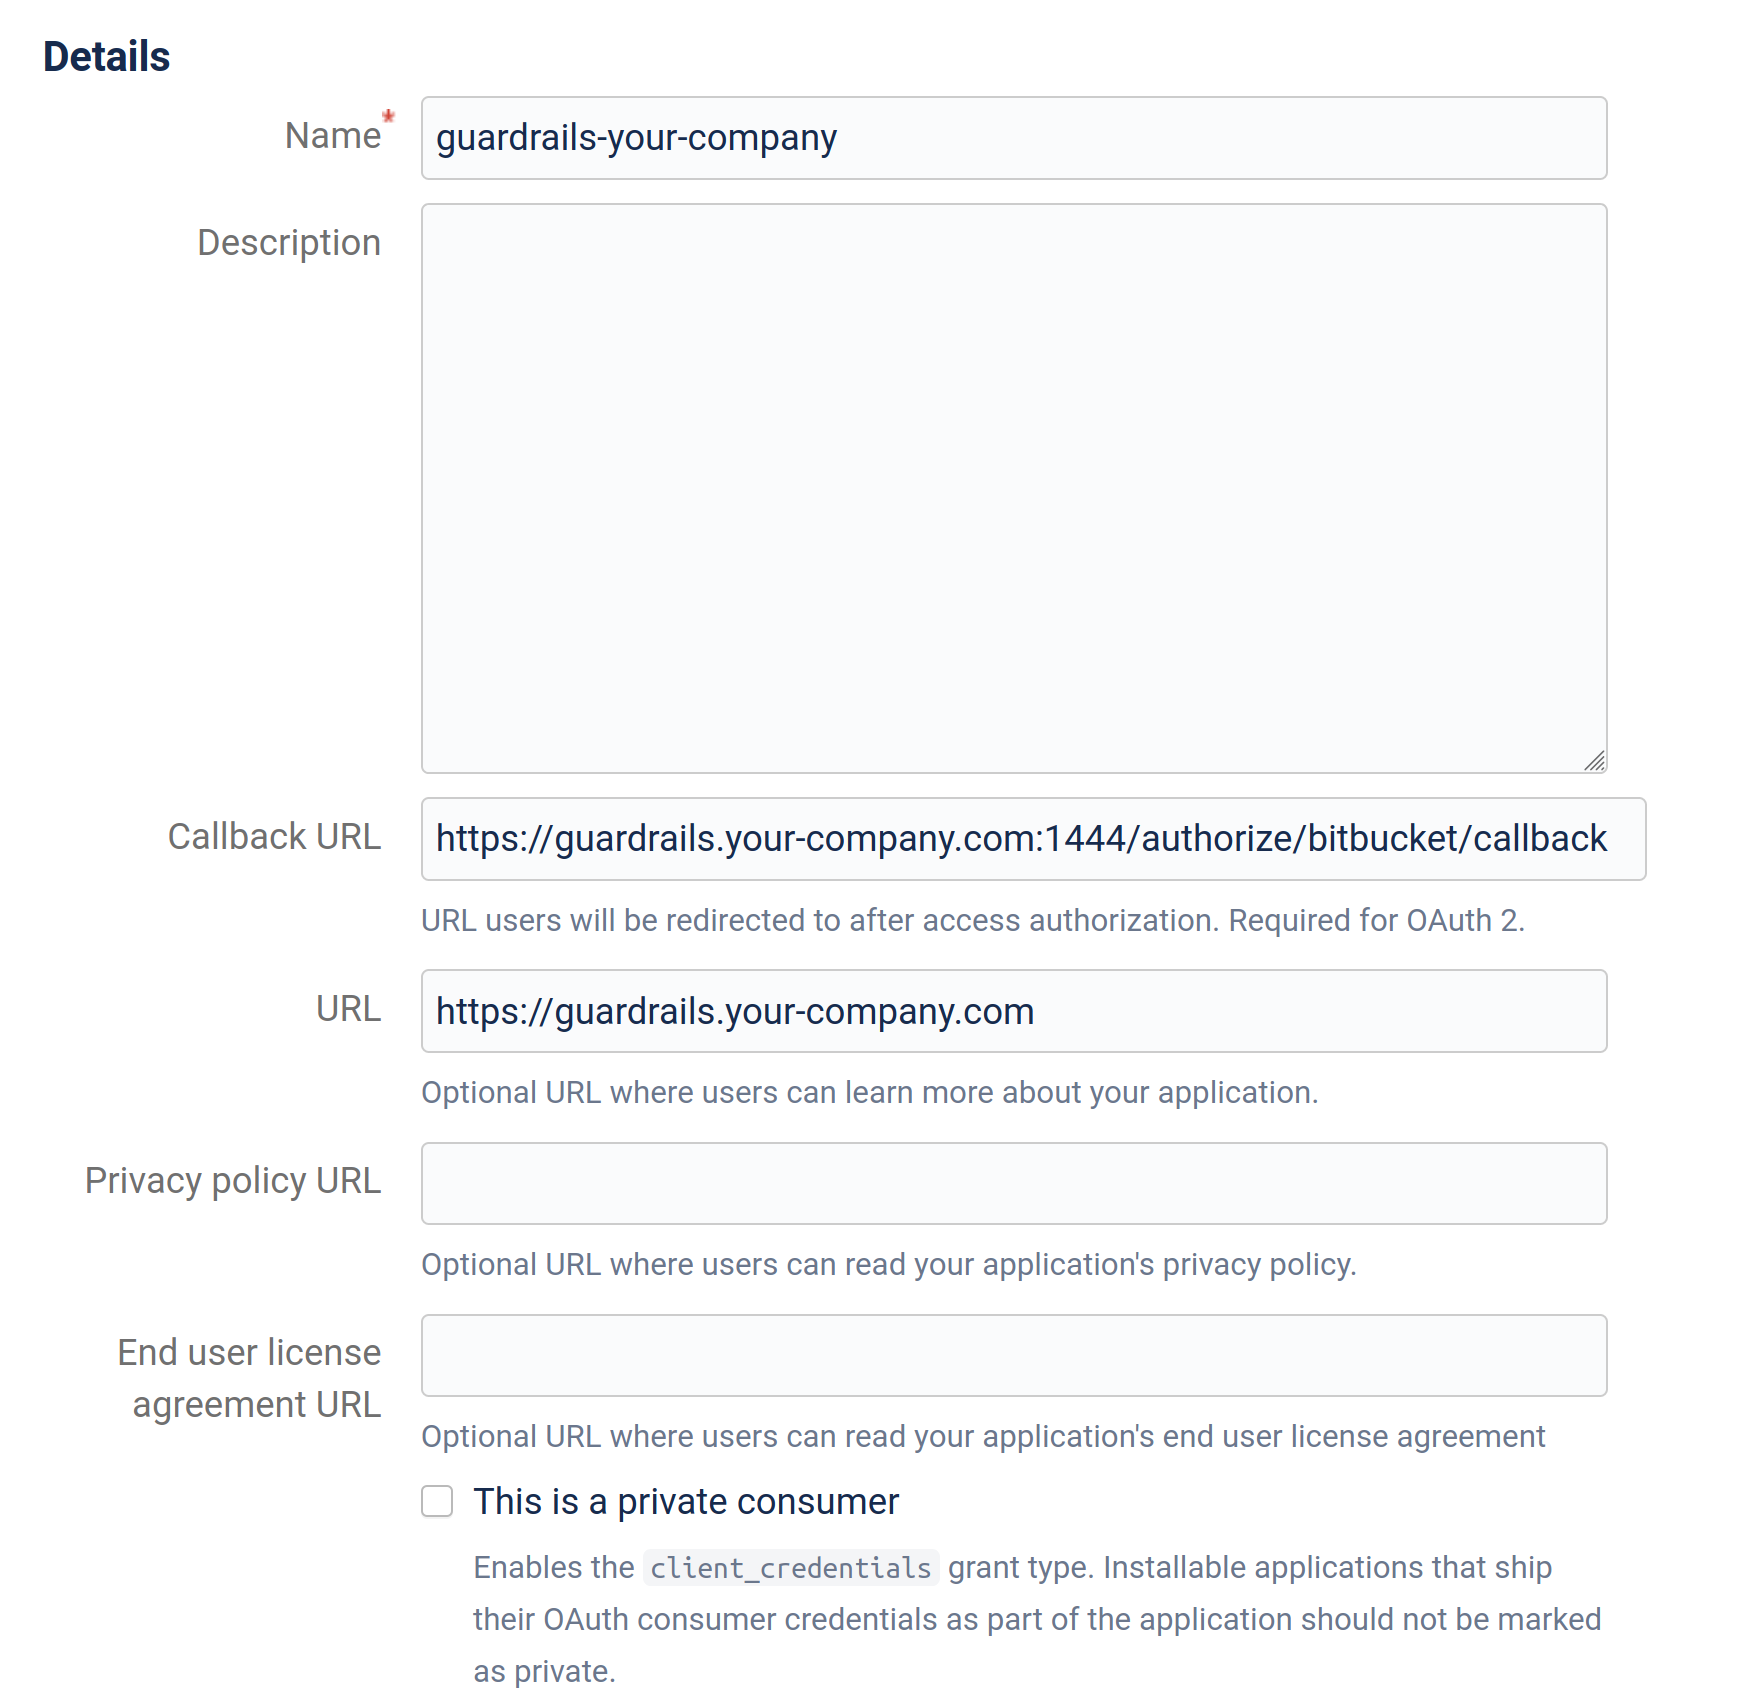
Add consumer. - Fill out the details like below:
- Name: guardrails-COMPANY_NAME (Note: you can enter any name that you want here)
- Description: (leave blank)
- Callback URL:
https://<YOUR_HOST>:1444/authorize/bitbucket/callback. - URL:
https://<YOUR_HOST>. - Privacy policy URL: (leave blank)
- End user license agreement URL: (leave blank)
- This is a private consumer: (leave unchecked)
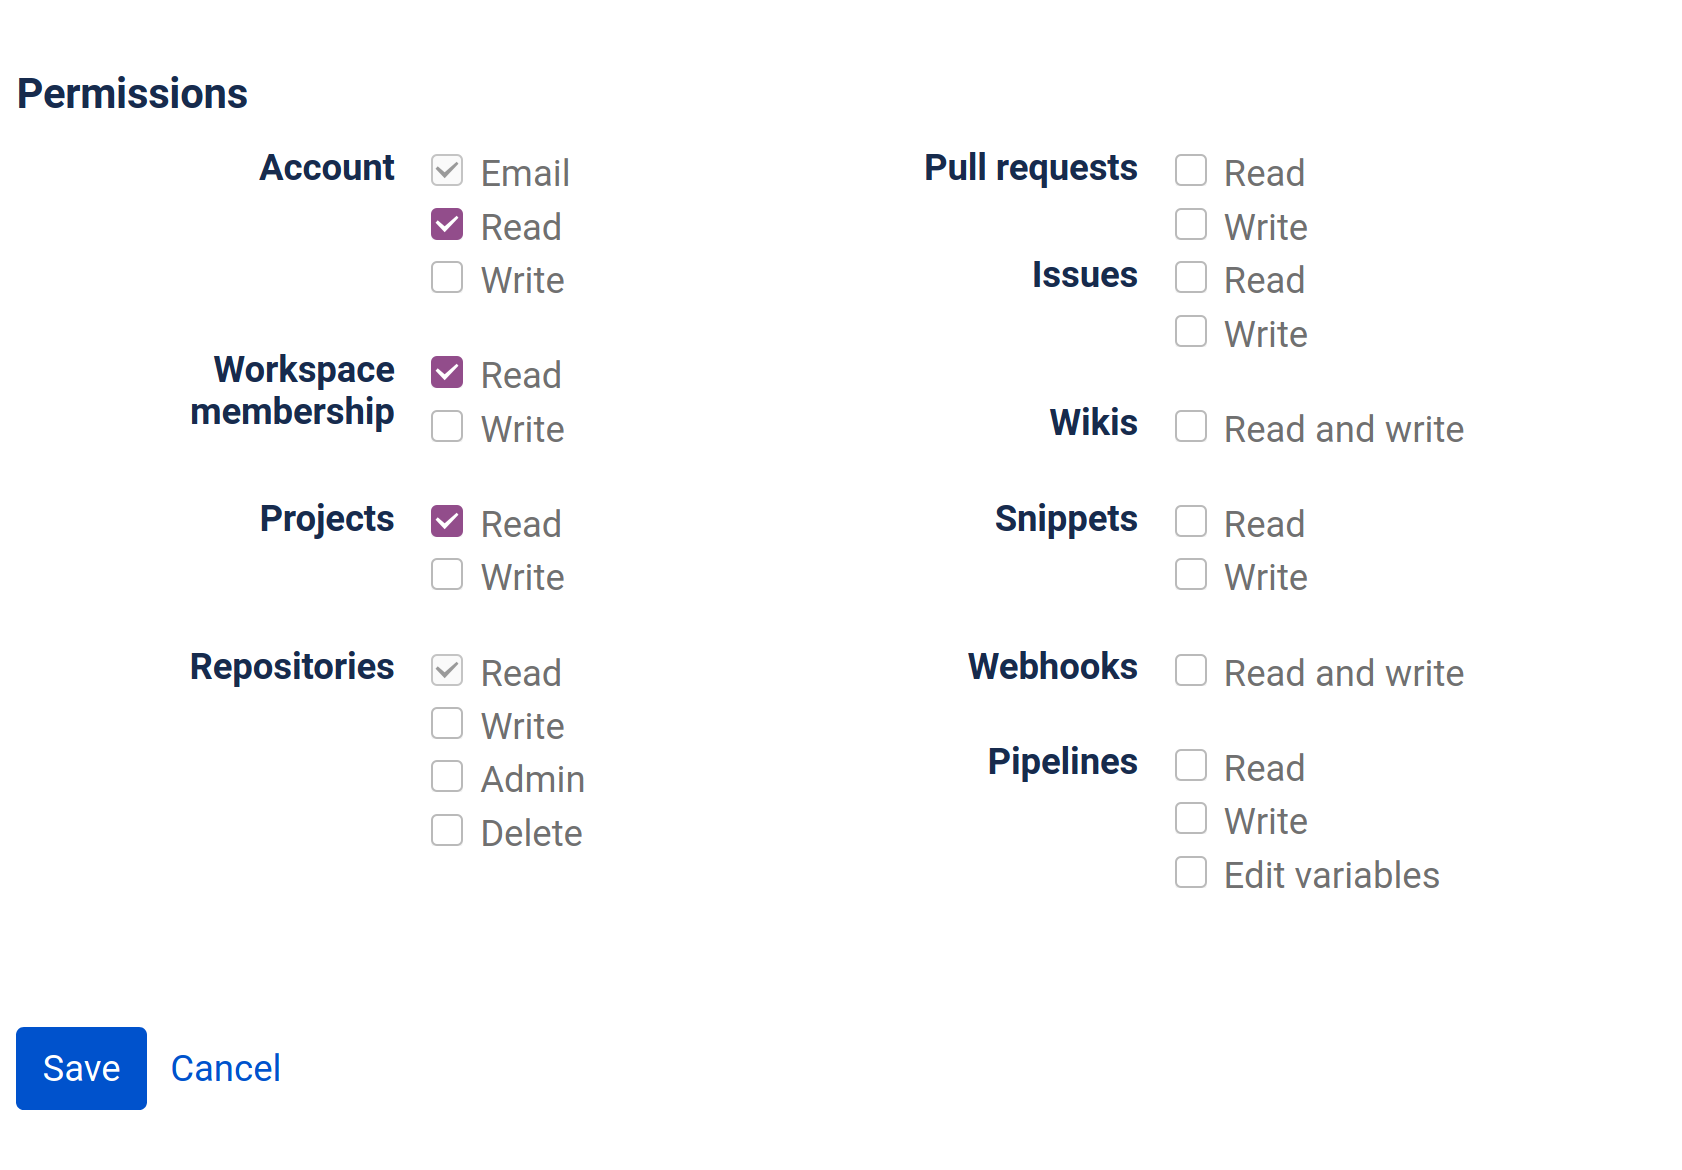
- Permissions: (see image below)
Here's an example of how the configuration could look like:
Click on Save.
Now your new oauth consumer should show up in the list, click on the name to expand it.
- Copy the value in the
Keyfield as you will need it later, we will refer to this value as<BITBUCKET_OAUTH_CONSUMER_KEY>. - Copy the value in the
Secretfield as you will need it later, we will refer to this value as<BITBUCKET_OAUTH_CONSUMER_SECRET>.
If you followed and completed the steps of this guide, you should have collected the following data in order to continue:
- Bitbucket connect app secret, refered as
<BITBUCKET_APP_SECRET>. - Bitbucket oauth consumer key, refered as
<BITBUCKET_OAUTH_CONSUMER_KEY>. - Bitbucket oauth consumer secret, refered as
<BITBUCKET_OAUTH_CONSUMER_SECRET>.
Make sure you have this before you continue with the rest of the deployment guide